
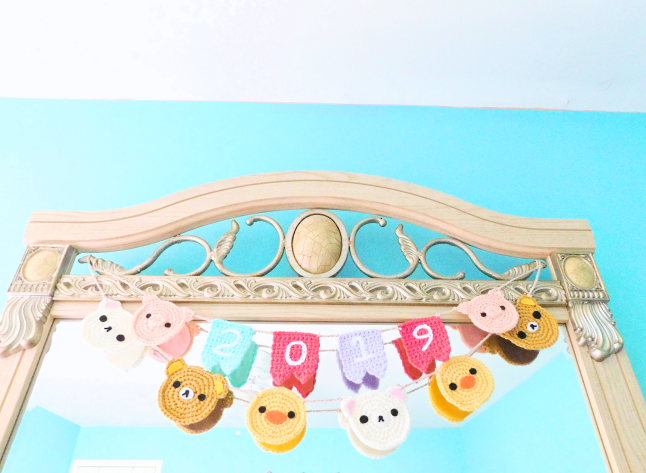
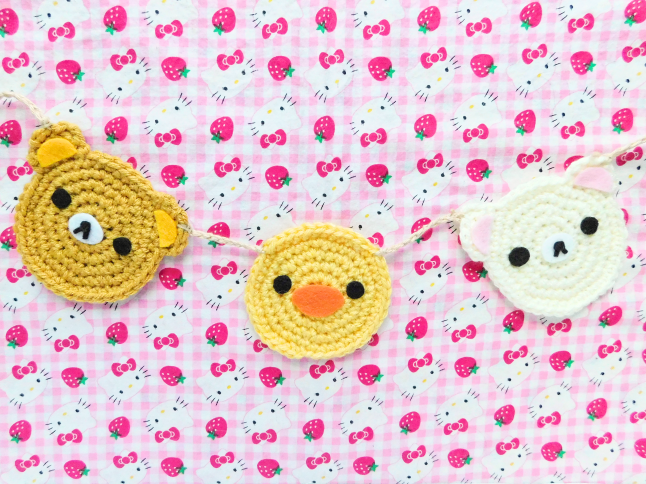
Today I will be showing the pattern on how to crochet this adorable Rilakkuma garland. The garland contains Rilakkuma’s friends Korilakkuma and Kiiroitori. This pattern is really simple so it’s perfect for beginners.
If you crochet this project, you can post it on Ravelry or tag me @mooeyscrochet so that I can see your creation. If you want to learn how to crochet, watch my crochet how-to video here. If you would like to support me for making this crochet pattern available for free, you can buy me a Ko-fi. Check out all of my free crochet patterns here and my shop to see my original crocheted items.
*DISCLAIMER: Links included in this post might be affiliate links. If you make a purchase with the links I provide, I may receive a small commission at no additional charge to you.
Supplies
– G/4.25 mm crochet hook (my favorite brand of hook)
– Light brown worsted weight yarn
– Cream worsted weight yarn
– Yellow worsted weight yarn
– Beige yarn (I used cotton)
– Black felt
– White felt
– Yellow felt
– Pink felt
– Orange felt
– Slanted tapestry needle (I use these)
– Glue (this is my favorite no-sew glue)
– Scissors
Aberrations
ch(s) – chains
st(s) – stitch(es)
slst – slip stitch (same as join)
sc – single crochet
hdc – half double crochet
dc – double crochet
flo – front loop only
blo – back loop only
cc – color change
dec – decrease (same as sc2tog) (single two st together)
inc – increase (make 2sc in a single st)
(x_) – repeat (_) amount of times
[x_] – repeat everything inside the [_] times amount of times
Crochet Level
Beginner
Pattern Notes
The pattern is written in US terms
This pattern uses a magic circle. Magic circle instructions here.
If you have any problems with this pattern feel free to contact me so that I can make corrections to the pattern.
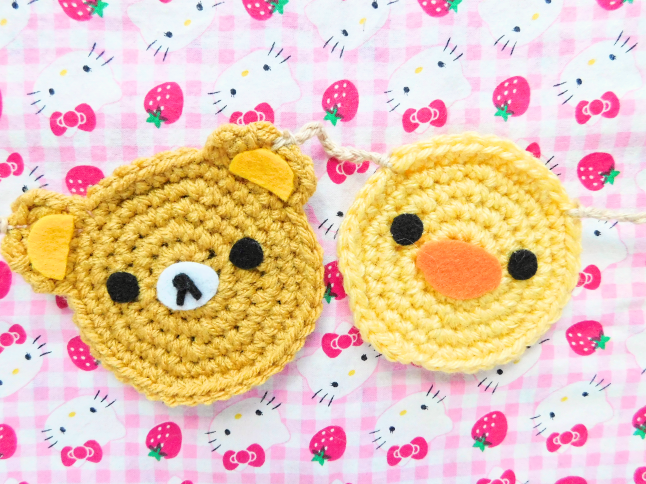
Head (make 6)
With G hook and cream yarn (make 2 for each color)
Round 1: magic circle, sc 8 sts. Total = 8 sts
Round 2: 2sc in each st all around.. Total = 16 sts
Round 3: [2sc in next st, sc 1 st](x8). Total = 24 sts
Round 4: [2sc in next st, sc 2 sts](x8). Total = 32 sts
Round 5: [2sc in next st, sc 3 sts](x8). Total = 40 sts
Round 6: sc 40 sts. Total 40 sts
Cut off and leave long tail for sewing
Ears (make 2 for one head)
With G hook and cream yarn (make 2 for each color)
Row 1: sc 5 sts. Total = 5 sts
Row 2: Turn, ch 1, sc 5 sts. Total = 5 sts
Row 3: Turn, ch 1, dec, sc 1 st, dec. Total = 3 sts
Cut off and leave long tail for sewing
Assembly
Crochet two Rilakkuma faces two Korilakkuma faces and two Kiiroitori. When making Kiiroitori skip the ears. With felt cut out all of the face parts such as the eyes, ears, mouths, etc. Glue and press lightly to secure.
To create a garland, start off by ch 11 sts, slst to 10 st from hook to form a loop, ch 20 sts, and slst to the corner of the face. Connect the faces by ch 10 sts and slst to their sides. Continue and finish with off the garland by ch 30 sts and slst to the 10 st from hook to form a loop.
Who’s your favorite San-X character?


Oh my goodness I love this!!
My mom taught me how to knit a lonnggg time ago but sadly I forgot.ADRI IN PINK ❀ INSTAGRAM ❀
Thank you ♥
These are so adorable and cute, I bet they look amazing out on display! You're so talented with your crochet 🙂
Kate | http://www.katelovesx.co.uk/
Awww, thank you for you sweet comment ♥